Today’s post has nothing to do with remote learning, hybrid learning, COVID-19, or Google Meet. Now don’t worry, I like to be efficient with people’s time, so I’m still going to blog about something I think you’ll find useful! It’s just something fun (well, I think it’s fun, but I’m also pretty nerdy).
I’ve used Keep, Google’s note-taking app, for several years for various things. Honestly, the biggest use I had for it for a while was a place to store recipes I found online. I’d also use it to take notes at conferences, but I never found myself as a daily user of Keep in my work life. Well, shoutout to Mrs. Rinehart, one of our Reading Plus teachers, who taught me how to use images as headers in Keep and then combine it with the Keep side panel in Gmail to create to-do lists.
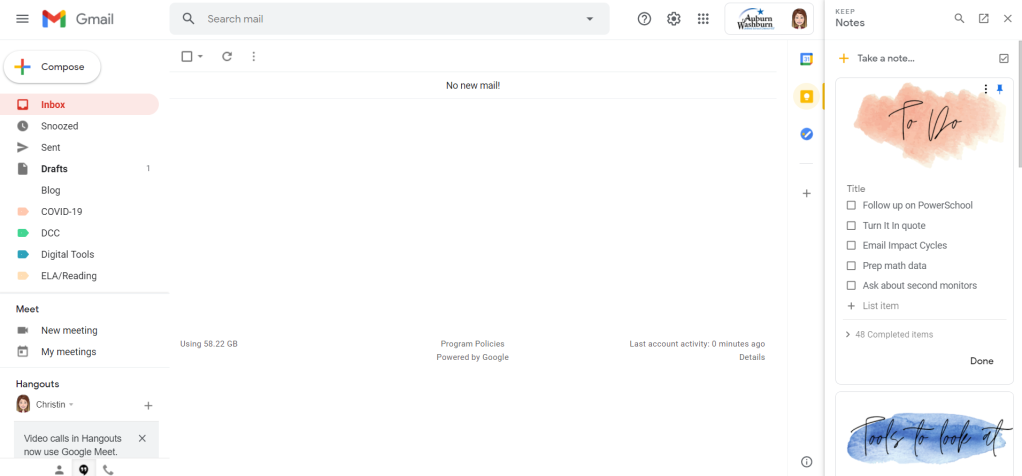
Don’t worry, my inbox isn’t really that neat during the middle of the week, but in the image above you can see my Keep to-do list on the right side panel. I LOVE this setup, and it works really well for me. Are you a list maker? Does seeing the above screenshot make you think, “I need this in my life?” Then keep reading!
To create the above effect, you’ll first need to go into your favorite design program. Some teachers love Microsoft Publisher, PowerPoint, Google Slides, or Drawings, so if that’s you, go for it! I, personally, love Canva, so that is what I used above (Side note – Canva for Education is free for educators and you get access to Canva Pro’s upgraded fonts and images!! Click here to apply.). My images are around 11 x 6 inches to make them work in Keep, but the design is all you. I have images that say To Do, Tools to Look at, Research, Blog Ideas, and Google. Think of the types of lists you would make. It may just be one image for to-dos! Once finished, you’ll download the images as .jpg or .png files.
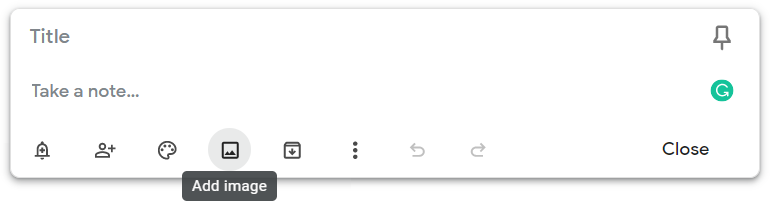
Next, you’ll go into Google Keep, at keep.google.com. You’ll create a new note, but DON’T add a title. Instead, click the add image icon and select one of the images you created. You also want to click the three dot menu and select Show checkboxes which will make your note turn into a list where you can check off items. You can repeat this process until you have as many checklists as you need. You can rearrange the lists so they will show up in a certain order. I have my to-do list pinned (click the pin icon) so it’s always at the top.

Once finished with your checklists, go into your Gmail. Click the yellow lightbulb icon in the right side panel and Keep will open. You should now see your lists!! I keep mine open most of the time, but you can always click the icon again to hide it. I love that I can see my email and my to-do list all on one page, and, bonus, they look nice, too. You’ll see the right side panel in other applications too, like Calendar and Drive, but I like having Keep open with my email.
A couple additional features of Keep – you can share notes with people if you want to collaborate, and you can archive old lists if you no longer need them. You can add labels to your lists if you want to organize multiple lists by type, and you can tie reminders to your lists as well! All of that needs to be done within the Keep site, not within the side panel.
Hopefully, this can help with the massive to-do lists that teachers have. I know some people like paper checklists, and I was that way too, until I tried this method out. Overall, do what works for you!
